BlackWater-Canal
Pre summary
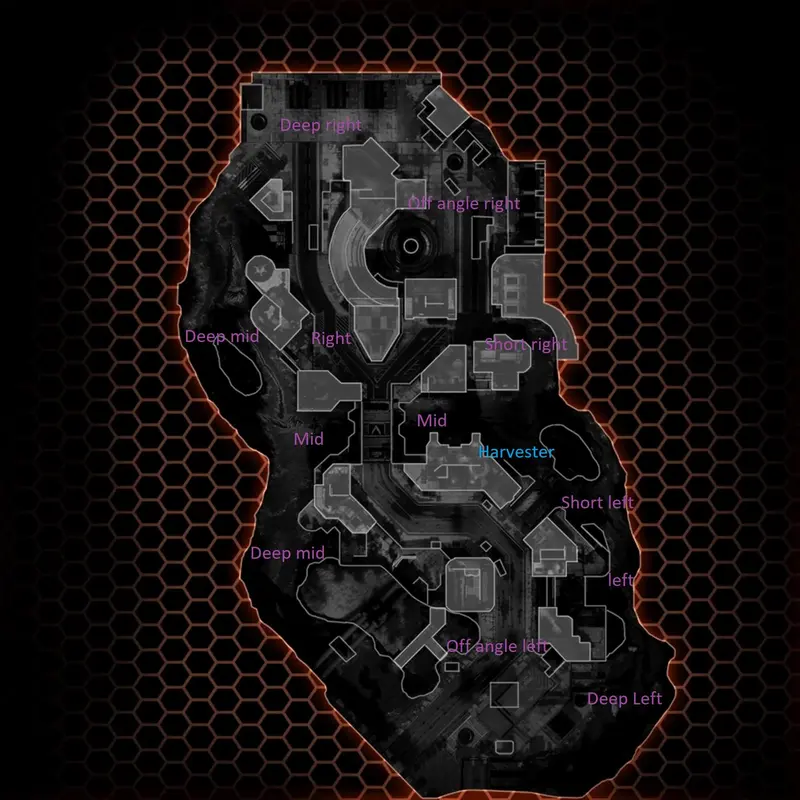
Good day, pilots. Here is another guide for frontier defense. This time, it will be about the map Backwater-Canal. Backwater-Canal is one of the easier maps in Frontier defense because enemy paths are predictable and the corridors are tight. Backwater Canal has some mortar titans, but with proper arc trap placement and good roaming, they won’t be an issue. Make sure every player can cover each of the 3 lanes (shown on the map). Waves 4 and 5 will have lots of enemies attacking mid-left, so someone must run there when needed. The biggest asset is the bridge in the center of the map. If any pilots use Tone as a titan, it is recommended that they be on the bridge for most waves. This allows maximum surface area for lock-ons, though they should roam when needed. Legion, Northstar, or almost any titan can fulfill this role, but not as well as Tone. Whoever is on the bridge can support every lane if they are a ranged-focused titan. Scorch is best suited below the bridge. Scorch is useful because the backwater canal has lots of choke points for thermite in all hallways leading to the harvester. The enemies that won’t spawn on Backwater Canal are cloak drones, plasma drones, and Monarch titans.
Wave 1
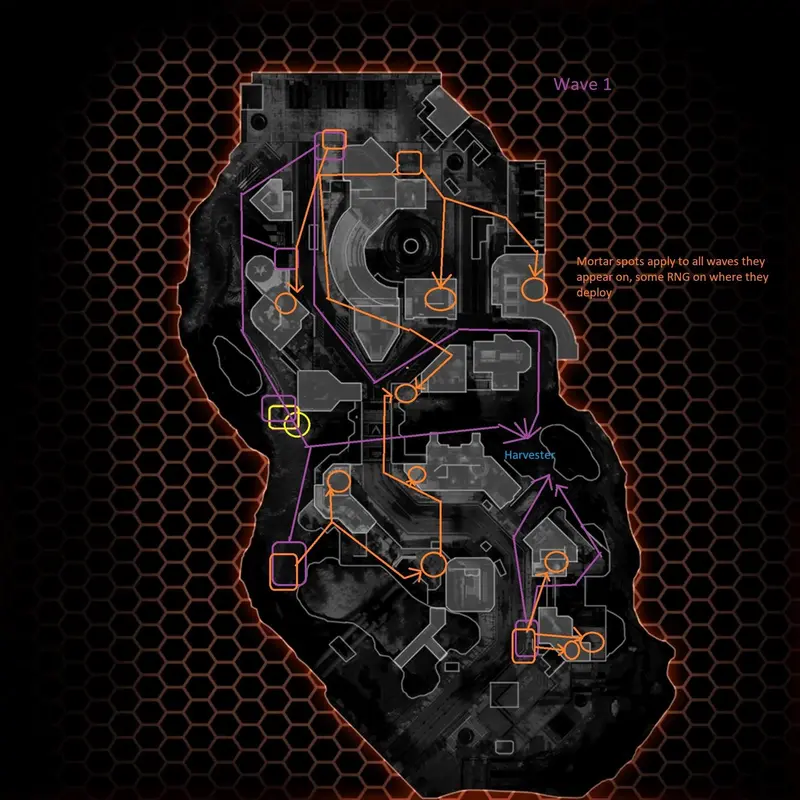
Wave 1 in the Backwater Canal is pretty easy. It will only consist of grunts and mortar specters for 99 percent of the wave. Grunts will spawn first, followed by mortar specters (paths shown on the map). Pilots should be quick to dispatch mortar specters before they set up. The biggest danger of Wave 1 is the Sniper Northstar that shows up near the end of the wave. She is very accurate and has a very aggressive a.i that will launch cluster missiles at pilots. This titan is also known to chase players after they pull a battery. If you decide to battery farm this titan, consider the risks. Cloak and stim will help a lot in surviving that titan encounter.
Wave 2
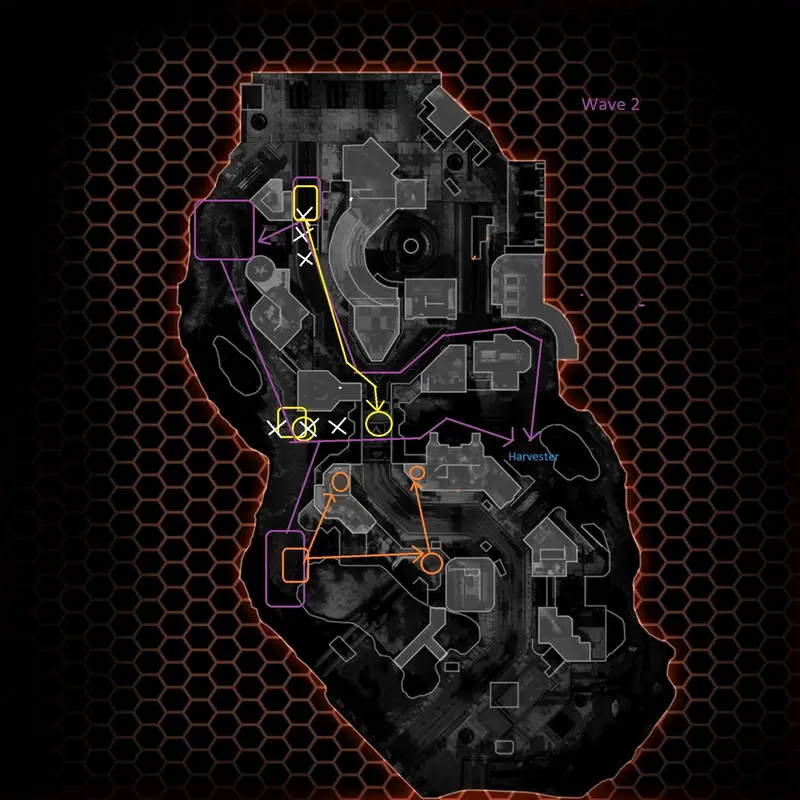
Wave 2 is where the enemy spawns ramp up. Beginning in this wave, deep mid will have ticks spawning from both left and right, so pilots beware. A sniper tone titan will spawn where the Northstar titan wave 1 spawned. Very easy to dispatch. Deep mid on both sides will be getting stalkers, reapers, Scorches, Tones, Ions, and Legion titans. Wave 2 only has 2 squads of mortar specters to dispatch, making wave 2 easier to roam. Pilots who are on the bridge need to watch out for deep right, as a few enemies spawn there, making their way to the right side of the harvester. Other than that, wave 2 is an easy win.
Wave 3
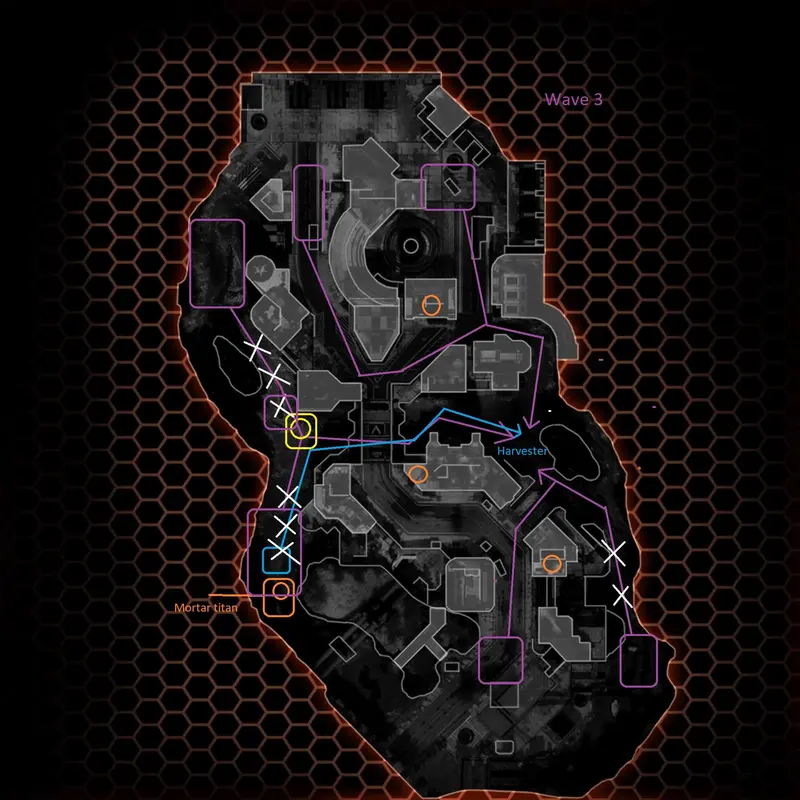
Wave 3 is when some roaming and some off angles need to be covered. To start, as always, a titan will spawn in that initial spot where that sniper titan spawns. This time, it will be a Legion titan. Both sides of mid will be getting enemies; some titans and some mortar specters will spawn. During this wave, off-angle right and off-angle left will be getting grunts, then after the grunts, 2 reapers and 1 ronin titan will spawn on each side. Make sure 2 pilots are ready to engage them. After that, off-angle left and off-angle right have no more spawns for the rest of the match. After the off-angle spawns, the mid spawns will ramp up, spawns of Scorches, an arc titan, Tone’s, Ion’s, and other enemies will begin to converge on the bridge lane. Whoever is on the bridge will be responsible for dealing the most damage and will need to watch out for deep right, as titans will spawn there. In order not be flanked, keep this spawn in mind. Focus arc traps on the right side path(not off angle) to make the bridge pilot’s job much easier. This wave will be the first wave to have enemies spawn deep left, which can catch the team by surprise. A few reapers and a Legion will spawn back there, so there won’t be much of an investment in time. Whoever is in mid on the ground floor should rotate to deal with the deep left spawn. After that massive wave is dealt with, 4 nuke titans will spawn on the left side of mid. This is a perfect opportunity for people to farm Titan Meter if their Titan is gone or if they need to eject to get a fresh Titan. After the nuke titans, the round is completed.
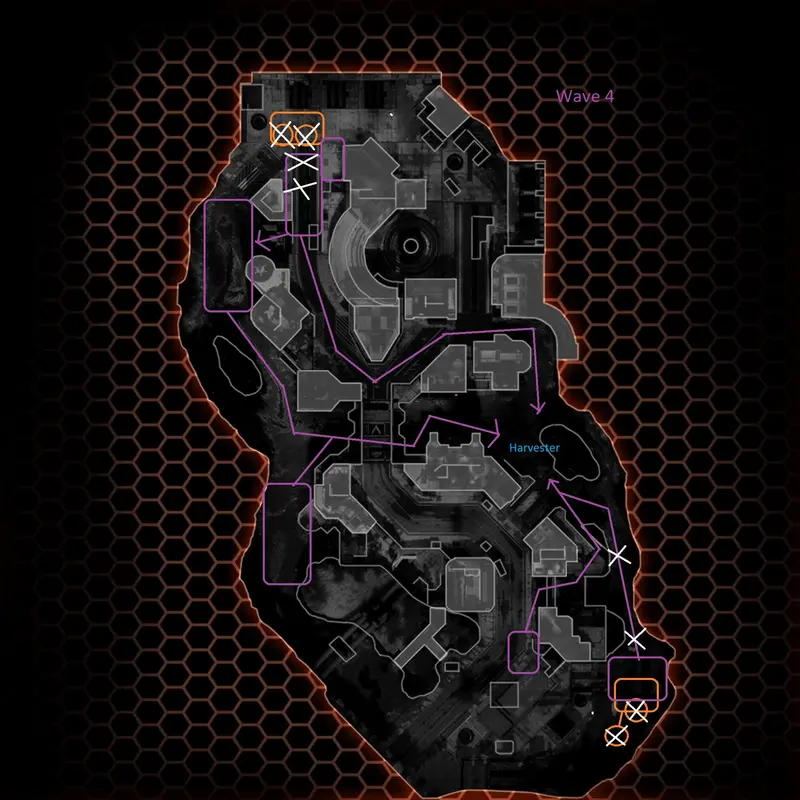
Wave 4
Mid won’t get as much action on wave 4. All the enemies will spawn in the deep right and the deep left. The wave starts with 2 Ions on both sides of the deep mids and some small enemies. Make sure someone is mid to help with the middle enemies. This wave will have 4 mortar titans in total. Two spawn deep right and two deep left as pairs. Soon after, both deep left and deep right get 3 reapers, and a Tone titan spawns soon after. Uniquely, these mortar titans are tied to map triggers. If one or both mortars in a pair die, the rest of the wave will begin to spawn in their area. Whoever is focusing deep left or deep right should distract the mortar titans and kill the Tones and reapers before dealing with the mortars. Once you decide to kill mortars, make sure both die quickly since only one death activates the map trigger. After the mortar titans are dead, 2 waves of stalkers, Scorch, Nuke titan, Legion titan, and reapers will begin to spawn. After those are destroyed, 4 nuke titans will spawn in mid. This is another chance to farm Titan Meter for pilots needing a new Titan. Wave 4 is not too hard with the right preparation and knowledge.
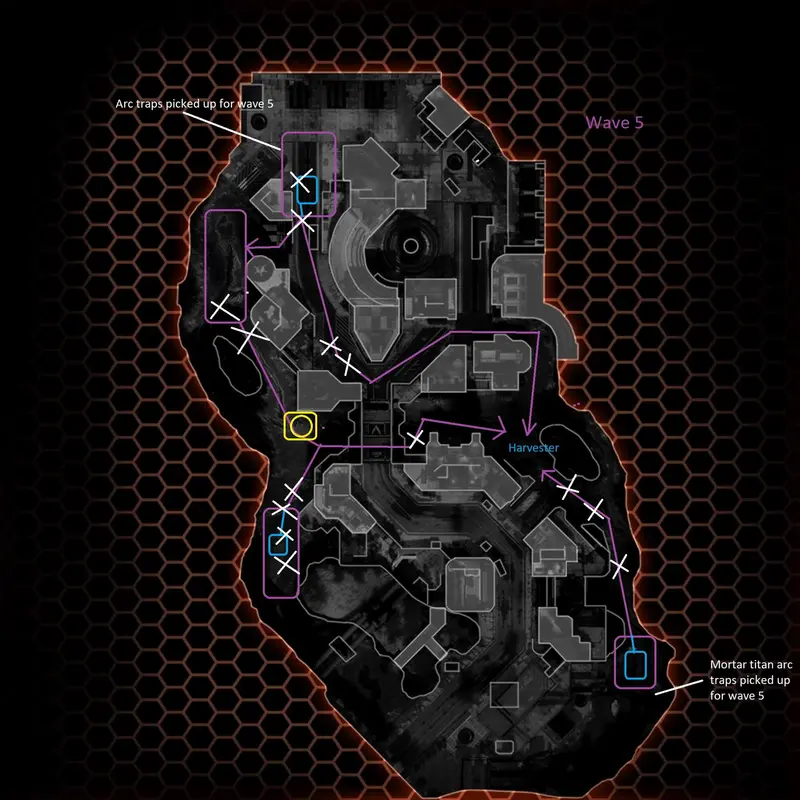
Wave 5
The final wave will have no mortar titans, so this will make it easier. Whoever placed arc traps for the mortar titans should move them to better spots. All three paths will get waves of titans and reapers. For the beginning of wave 5, reapers will come from 3 different directions: deep right, back left, and front right and front left that converge under the bridge. Players must split up and cover each lane, especially the back left lane, or else mission failure is possible as a squad of reapers will sneak by and attack the harvester. This has resulted in wave losses in the past. After the reapers spawn, the main wave now comes. No mortar titans or specters will spawn this wave, so pilots can focus on the enemies in front of them. Pilot(s) on the bridge should watch out for deep right, like in previous waves, enemies will spawn there. The first part of wave 5 will have deep mid on the left and right side spawn reapers. Very soon after the deep right wave spawns a Scorch titan and stalkers that will move on the right path, pilots keep this in mind, as a flanking Scorch can be deadly. Deep left will get some enemies spawning as well. This wave consists of arc titans, Scorch, Legion, and nuke titans that converge on the harvester on all 3 lanes. Keep this in mind, as arc titans are very dangerous in corridor fights, so focus them down first. Make sure someone is in position to cover the deep left lane, as once the main middle wave portion is defeated, the deep right gets a lot of enemy spawns. Soon after the Deep right wave spawns, Deep left will be getting an arc titan and some nuke titans. After the deep left wave is defeated, a few nuke titans will spawn deep mid and make their way to the harvester. After those nukes are defeated, then the wave is completed. Not too hard a wave.
Post Summary
Blackwater Canal is one of the easier maps due to the bridge being an incredibly good positional asset for militia titans, Tone titans especially. As long as the bridge is held, the wave should go over smoothly. Whoever holds the bridge choke point on the ground would make good use of a Scorch titan, or if you are up to a challenge, a Monarch titan can hold that angle very well. Since Titans line up in lanes in this map, Legion and Northstar Titans can make great use of their piercing shot abilities. If pilots are aware of the deviant sneaky spawns, then this map is basically a free win. Have fun, Pilots.